You’ve successfully had a pest controller treat your home – great! But the job isn’t over yet. The period immediately after treatment is crucial for preventing a recurrence and ensuring your home is safe and clean. This post-treatment: your essential 7-day re-proofing and cleaning checklist guides you through what to do after rat extermination, ensuring a long-term pest-free home.
Day 1–3: Initial actions and safety first
- Ventilate: Immediately after treatment, open windows and doors to thoroughly air out your property, especially if chemical treatments were used.
- Avoid contact: Resist the urge to clean up droppings or dead pests immediately. Allow the treatment to work fully, as some pests may take a few days to succumb. This is particularly relevant if residual sprays were used.
- Pet and child safety: Ensure children and pets remain away from treated areas as advised by your pest controller. Remove any bait boxes as soon as advised.
Day 3–7: The deep clean – how to clean up rat droppings safely
This is a critical part of your post pest control cleaning guide, especially how to clean up rat droppings safely. Rodent droppings and urine can carry diseases, so handle them with care.
- Protective gear: Always wear disposable gloves, a mask (to avoid inhaling dust particles that can carry pathogens), and ideally use eye protection.
- Do not vacuum or sweep dry: This can aerosolise harmful particles.
- Dampen: Lightly spray droppings and contaminated areas with a disinfectant solution (like a bleach solution or household disinfectant). Let it soak for 5 minutes.
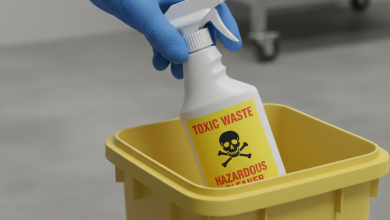
- Wipe: Use paper towels to wipe up the droppings and dispose of them in a sealed plastic bag in your outdoor bin.
- Disinfect: Thoroughly clean all contaminated surfaces with disinfectant.
- Vacuum (after 7 days): Only after a week (or as advised by your pest controller) should you deep vacuum carpets and rugs to remove any remaining debris or dead insects. Dispose of the vacuum bag immediately.
The pest control proofing checklist: securing your home
This is the vital ‘re-proofing’ stage to ensure pests don’t return. This pest control proofing checklist builds on any initial proofing done during treatment.
- Seal entry points: Re-inspect all known and potential entry points (as discussed in previous blogs). Seal any new gaps you find, or old ones that were temporarily fixed. Use durable materials like wire mesh, cement, and sealant.
- Trim vegetation: Cut back any tree branches or dense foliage touching your house, as these can provide pest highways.
- Secure bins: Ensure all outdoor bins have tight-fitting lids and are stored away from the house.
- Food storage: Store all food in airtight containers, especially pet food and bird seed.
- Monitor: Place monitoring traps (non-lethal sticky traps or humane cages) in areas where activity was present to detect any new incursions.
Disinfect house after rodent removal completely to ensure hygiene.
Why use Rated People for pest control proofing and cleaning?
Knowing what to do after rat extermination and thorough post pest control cleaning guide are key to long-term success. Our platform connects you with pest controllers who not only treat the initial problem but also offer comprehensive advice on how to clean up rat droppings safely and implement a robust pest control proofing checklist, giving you enduring peace of mind.
With Rated People, you have the power to get it done. Find a trusted, local tradesperson today.